Let us prepare the branch infobase for the exchange.
- Open the branch infobase configuration in Designer mode.
- On the Configuration menu, click Open configuration.
You can see that the list of configuration objects is empty. - On the Configuration menu, click Load configuration from file, select the file that you created earlier (for example, D:\Practical developer guide\branch\1Cv8.cf), and click Open.
- When prompted to confirm the configuration update, click Yes.
- In the list of configuration changes, click Accept.
All the configuration objects are now transferred from the central infobase.
There is one thing that requires special attention. The data exchange objects include the Warehouses catalog that has a predefined item named Main.
When you create catalogs or other configuration objects that can have predefined items, their Update predefined data property is set to Auto. It means that, once a database is restructured or a table that stores the configuration object data is accessed for the first time, data items linked to predefined data items by name are created or updated.
In this scenario, once you open the list of warehouses, the platform automatically creates an item in the Warehouses catalog, which is linked to the predefined catalog item named Main. And the catalog item property PredefinedDataName is set to Main. This link can only be changed using 1C:Enterprise script.
Then, once you load data from the central infobase to the Warehouses catalog, the platform adds another data item linked to the Main predefined item of the Warehouses catalog. This will cause an error because a configuration cannot have two items linked to a single predefined item.
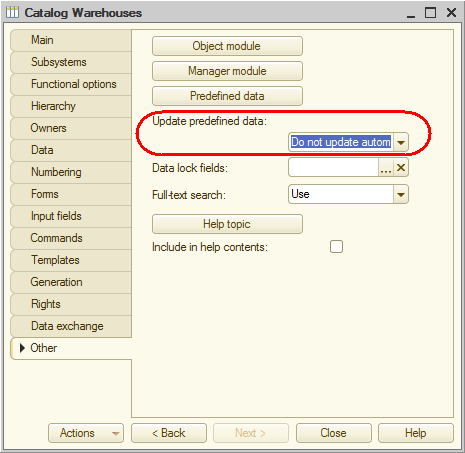
To avoid this, you have to change the property value. - Open the object editor window of the Warehouses catalog, click the Other tab, and set Update predefined data to Do not update automatically (fig. 24.13).

Fig. 24.13. Editing the properties of the Warehouse catalog - On the Administration menu, click Users and create a single user: Administrator with Administrator role.
This is because you need to create users from scratch in each infobase.

